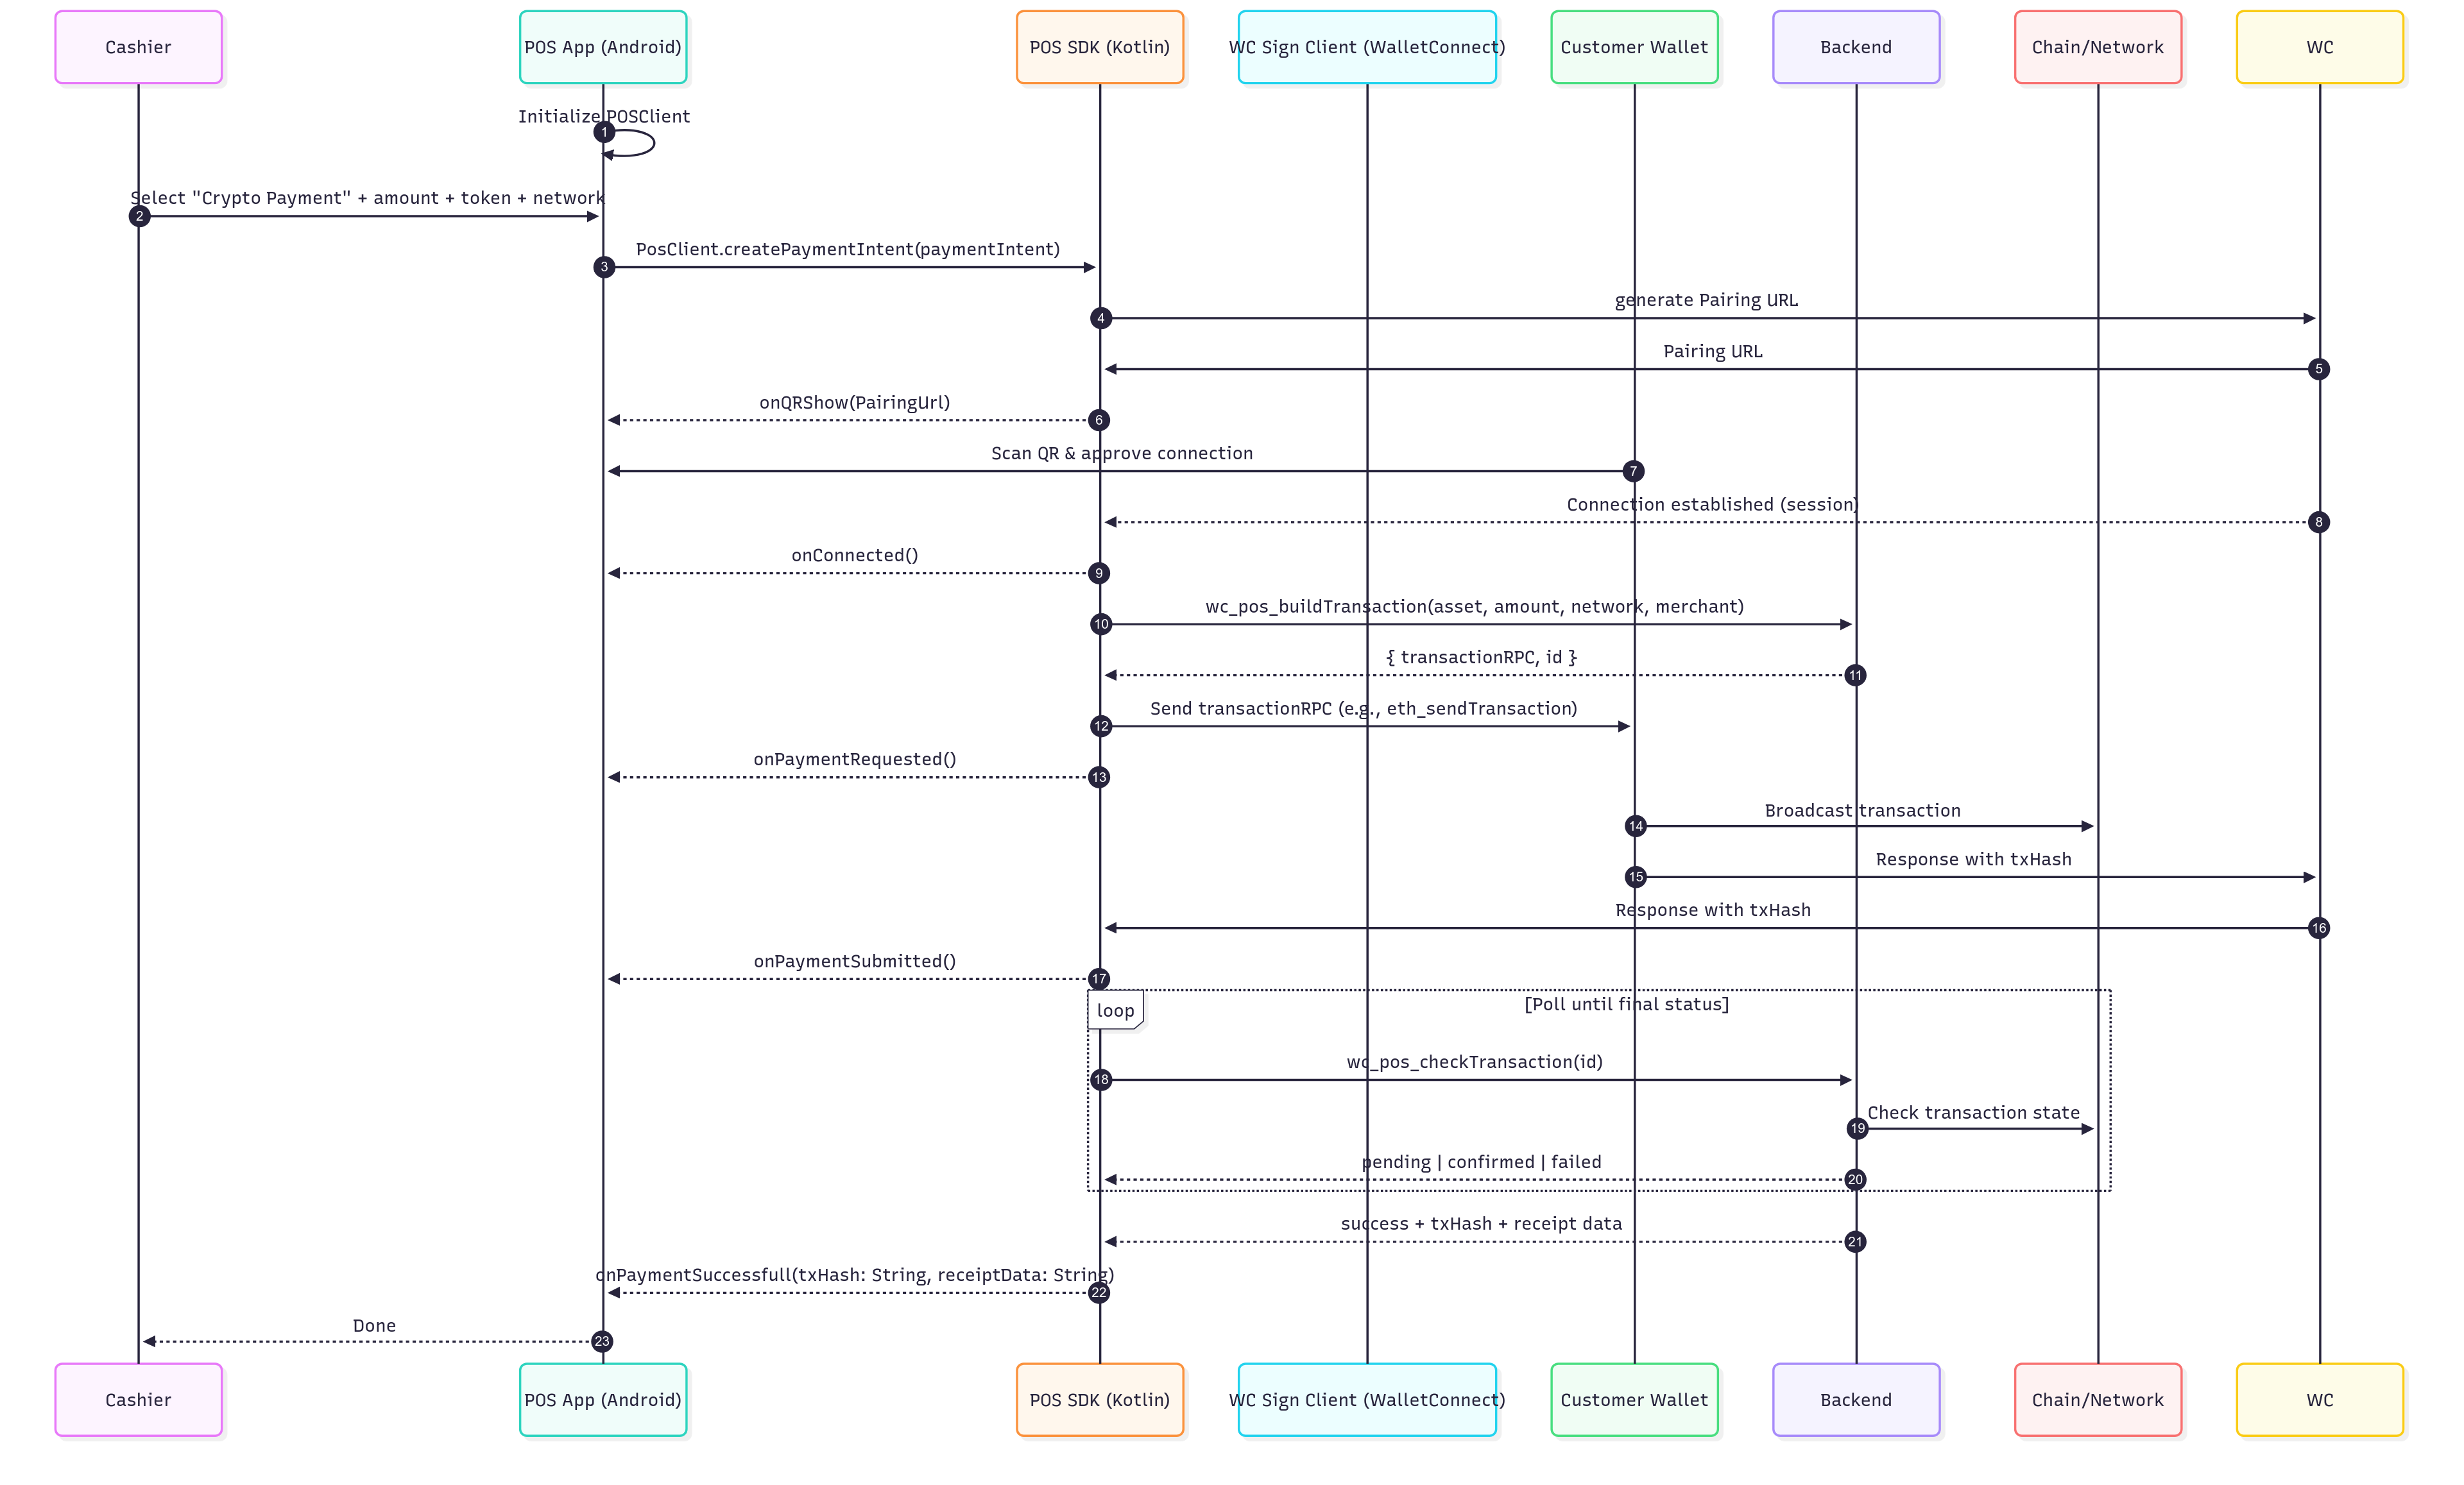
User flow
- Cashier selects “Pay with Crypto” on the POS.
- Customer chooses token and network on the POS (e.g., USDC on Solana/Ethereum).
- POS shows a WalletConnect QR.
- Customer scans with their wallet; session is established.
- POS requests the payment.
- Wallet displays amount and the customer approves.
- The transaction is broadcasted by the wallet.
- POS shows confirmation
SDK Methods
The WalletConnect POS SDK exposes methods and callbacks to create smooth payment flows.The methods here are shown in isolation, for a full guide on how to use them follow to the step by step guide at the bottom.
Initialization
To initialize the SDK you have to call the initialize method with theinitParams
POS.Params.Init are as follow
Payment Intent
A payment intent is the server-side entity that specifies exactly what must be paid(asset, chain, amount) and how we will validate it.
PaymentIntent has the following fields:
- Generates the connection URL
- Sends the connection proposal to the wallet
- Awaits the connection result
- Builds and sends the transaction to the wallet
- Awaits the transaction result from the wallet
- Checks the transaction status
Payment intent life cycle
The WalletConnect POS comes with a set of different UI events that allow to adapt the POS UI depending on the status of the payment.How to Integrate the POS SDK
Below are the steps to integrate the Kotlin POS SDK into your project.Sequence Diagram
Prerequisites
To use the POS SDK you will need the following:- Project ID from the WalletConnect Dashboard (dashboard.walletconnect.com) .
- Latest SDKs (Reown Kotlin): https://github.com/reown-com/reown-kotlin/releases
- Requirements: Android min SDK 23
IMPORTANT: The WalletConnect POS is not available to download yet.
Integration Steps
1
Add the Kotlin POS SDK dependencies
First, add the dependencies to your project’s
build.gradle.kts file as shown below:/app/build.gradle.kts
2
Initialize the POS client
3
Wire the UI
It’s important that you register the UI callbacks and delegate them before triggering a payment, or you risk missing early events like
onQRShow.4
Initiate the payment
Now, you can create a payment intent and initiate the payment.
5
Render QR code and connect
Use
onQRShow(uri) to render the WalletConnect QR; on successful session you’ll receive
Connected you can use this state to show a loading spinner indicating that the payment request will follow.Projects need to create their own UI.6
Send Transaction and observe status
The SDK takes care of sending the transaction and depending on the status it will trigger different life-cycle events
PaymentRequested→ wallet prompt shown to the userPaymentBroadcasted→ tx broadcastedPaymentSuccessful→ tx confirmedError(val error: Throwable)→ tx failed to complete